
Microgreens are young vegetable and herb seedlings, harvested one to three weeks after planting, prized by chefs and home cooks for flavor, color and nutrition. Because they grow quickly indoors on racks, a microgreens business can start in a spare room, garage or small warehouse with modest equipment.
The challenge is selling: microgreens are perishable, so you grow to order for restaurants, markets, grocers and subscribers on a steady weekly schedule. The Bureau of Labor Statistics reports a median pay of $87,980 for farmers, ranchers and other agricultural managers (May 2024), though most small farm owners earn far less in their early years, and employment in the occupation is projected to decline slightly. This guide covers setup, growing, food safety, selling, pricing, a worked example and a 90-day plan.
A microgreens business at a glance
Table of Contents
| Topic | What to expect |
|---|---|
| Startup cost | Low: shelving, LED lights, trays, growing medium, seeds, packaging and a refrigerator |
| Licenses | Business license; state and local rules for selling produce; food safety practices; some markets require insurance |
| Growing cycle | About one to three weeks from seed to harvest, depending on the variety |
| Customers | Restaurants, farmers markets, grocers and co-ops, and home subscriptions |
| Best for | Organized growers who like routines and selling to chefs and neighbors |
Who microgreens suit
Microgreens suit people who like steady routines (seeding, watering and harvesting on a schedule), attention to cleanliness and selling face to face. It is a popular side business that can grow into a full-time urban farm.
Setting up your grow space
- Space: a clean, temperature-controlled room, basement, garage or small warehouse with easy cleaning.
- Racks and lights: wire shelving with LED grow lights on timers.
- Trays: standard growing trays, with and without drainage holes.
- Growing medium: soil mixes, coconut coir or grow mats, depending on your method.
- Airflow and humidity control: fans and dehumidifiers to prevent mold.
- Refrigerator: to cool harvested greens quickly and keep them fresh.
Growing on a schedule
Each variety has its own timeline: soaking (for larger seeds such as peas and sunflowers), seeding density, a blackout period, light exposure and harvest. Keep a planting calendar based on your weekly orders and seed a little extra to cover losses. Start with a few reliable crops (sunflower, pea shoots, radish, broccoli and a mix) before adding specialty varieties chefs request.
Food safety and regulations
Microgreens are eaten raw, so cleanliness matters. Use clean water, sanitize trays and tools, wash hands, keep pests out, harvest with clean blades and refrigerate promptly. Use seed sold for sprouting or microgreens production from reputable suppliers.
The FDA’s Produce Safety Rule sets standards for farms that grow produce eaten raw, but very small farms below the rule’s sales threshold are not covered, and others may qualify for a modified exemption. Check where you fall, and follow state and local rules for selling produce. Some states and markets have their own requirements.
Startup costs to plan for
| Item | What to budget for |
|---|---|
| Racks and lights | Shelving, LED fixtures, timers |
| Trays and medium | Trays, soil or coir, mats |
| Seeds | Bulk seed for your main crops |
| Climate control | Fans, dehumidifier, thermometer |
| Packaging and labels | Clamshells or bags, labels |
| Refrigeration | A dedicated refrigerator |
Use our startup cost calculator for your total.
Selling microgreens
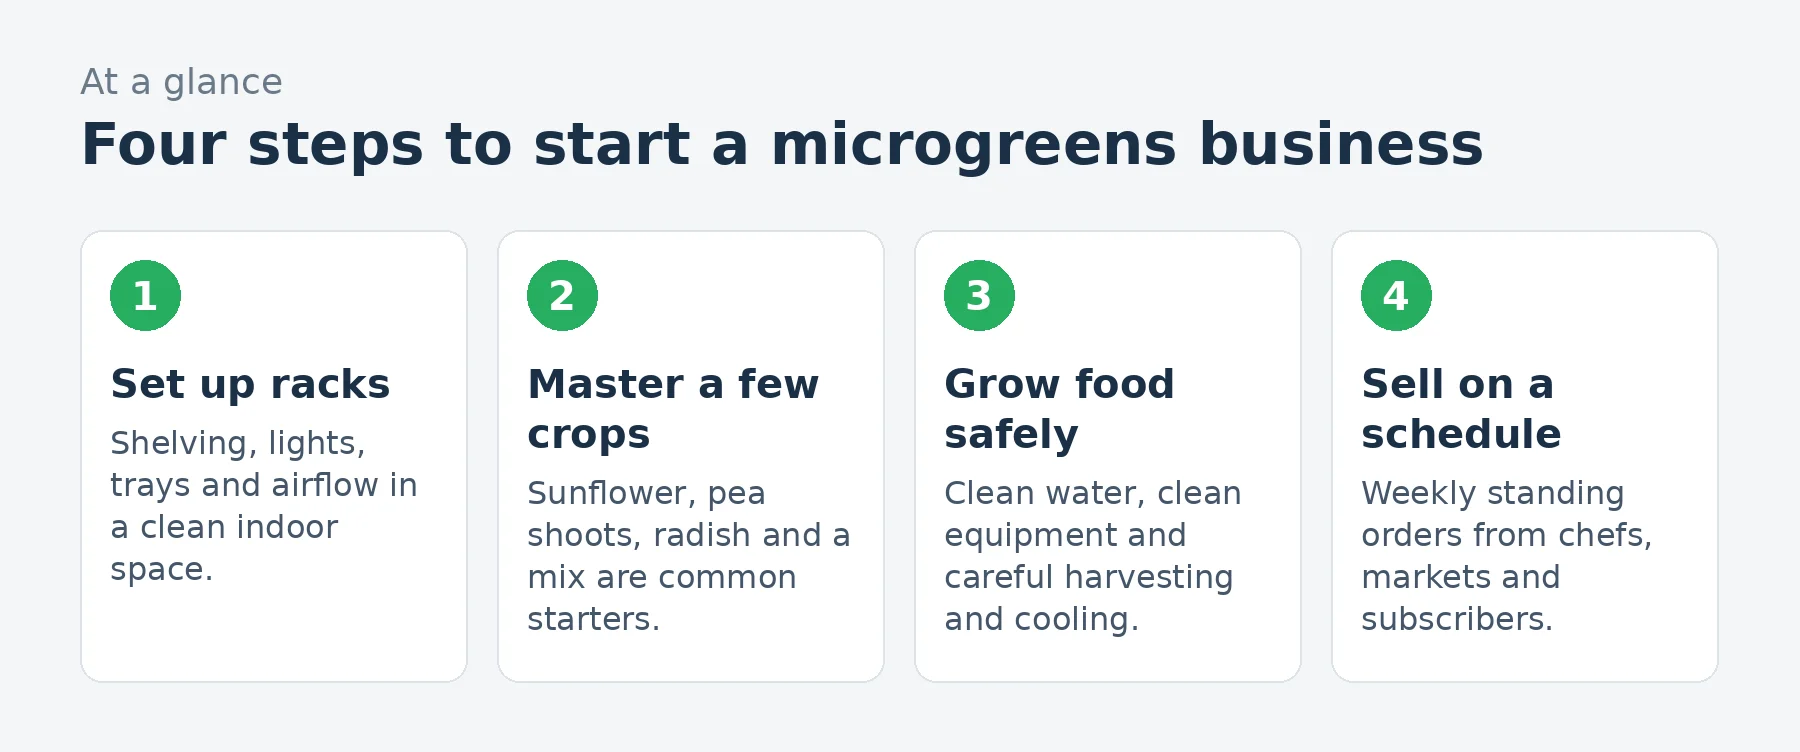
- Restaurants: bring samples to chefs, offer weekly standing orders and deliver on the same day each week.
- Farmers markets: colorful displays and tasting samples; many markets accept SNAP benefits through USDA programs.
- Grocers and co-ops: local produce sections, with consistent supply and packaging.
- Subscriptions: weekly or biweekly home deliveries.
- Live trays: some chefs and customers buy living trays they cut themselves.
Pricing
Price by weight or by container, with lower per-ounce prices for chefs buying in bulk and higher prices for retail clamshells. Calculate seed, medium, packaging and electricity cost per tray, plus your time, and compare with local growers. Use our pricing calculator.
A worked example: a small indoor operation
These are illustrative assumptions for a small indoor operation, not predictions.
| Assumption | Monthly | |
|---|---|---|
| Restaurant standing orders | 12 accounts, weekly, about $160 a month each | $1,920 |
| Farmers market sales | 4 markets at $350 | $1,400 |
| Home subscriptions | 40 subscribers at $25 a month | $1,000 |
| Revenue | $4,320 | |
| Seeds and growing medium | $(650) | |
| Packaging | Clamshells and labels | $(300) |
| Electricity and water | Lights, fans and refrigeration | $(200) |
| Market fees, delivery and fuel | $(350) | |
| Insurance and software | $(100) | |
| Profit before owner pay and taxes | $2,720 |
That leaves about $2,720 a month before the owner’s pay and taxes, on about $4,320 of revenue. Labor is the hidden cost: seeding, watering, harvesting, packing and deliveries take many hours each week.
Pricing for chefs
Chefs value consistency, freshness and reliable delivery as much as price. Offer a simple price list by weight for bulk orders, a sample tray to try new varieties and a delivery day that fits their prep schedule. Ask what they need for upcoming menus; specialty items such as shiso, nasturtium or amaranth can command higher prices from creative kitchens.
Harvesting and packing
Harvest in the morning when greens are cool and crisp, cut cleanly above the growing medium, cool them promptly and pack them dry to prevent spoilage. Label containers with the variety and harvest date, keep them refrigerated and deliver within a day or two. Track shelf life for each variety and tell customers how to store greens.
Scaling up
Grow by adding racks only when orders are steady, then consider a larger dedicated space, automated watering, more efficient lighting and a part-time helper for harvest and delivery days. Larger operations may become covered by the Produce Safety Rule and need written food safety practices, so plan for that as sales grow.
Choosing varieties
Start with reliable sellers, then add variety. Sunflower and pea shoots are hearty and popular, radish adds color and spice, and broccoli and kale are prized for nutrition. Mixes sell well to home customers. Chefs often want specialty items for garnish and flavor. Track germination, yield per tray and sales for each variety, and drop the ones that do not earn their space.
Home subscriptions
Subscriptions turn microgreens into predictable income. Offer weekly or biweekly deliveries of a mix or rotating varieties, with simple online sign-up and payment, a delivery day by neighborhood and clear pause and cancel options. Include a card with ideas for using each week’s greens; it keeps subscribers excited and reduces cancellations.
Funding a small farm business
Small farm businesses can use several funding sources beyond savings: USDA Farm Service Agency microloans and farm loans (including programs for beginning farmers), state agriculture grants, local farm incubators, crowdfunding and community-supported pre-sales such as CSA shares or presales of products. Talk to your local USDA service center and extension office, which also offer training and technical help for new farmers.
Insurance and records
Carry general and product liability insurance, especially when selling at markets and to stores, and ask about farm property coverage for buildings and equipment. Some crop and livestock insurance programs are available through USDA. Keep clear records of sales, expenses, production and any food safety practices; they support taxes, loans and insurance claims.
Common mistakes to avoid
- Growing before you have buyers.
- Too many varieties at once.
- Poor airflow that leads to mold.
- Underestimating harvest and delivery time.
- Inconsistent supply that loses restaurant accounts.
Your first 90 days
- Days 1-30: set up a small rack, grow five varieties and record yields and timing.
- Days 31-60: visit ten chefs with samples, join a farmers market and set prices.
- Days 61-90: lock in weekly standing orders, launch a subscription and expand racks only as orders grow.
Frequently asked questions
How long do microgreens take to grow?
Usually about one to three weeks from seed to harvest, depending on the variety.
Do I need a license to sell microgreens?
Usually a business license, plus any state or local produce rules. Very small farms may be exempt from the FDA Produce Safety Rule; check your status.
Who buys microgreens?
Restaurants, farmers market shoppers, grocers and co-ops and home subscribers.
How do I prevent mold?
Use good airflow, proper humidity, correct seeding density and clean equipment.
Can I grow microgreens in my house?
Many start at home in a clean, dedicated space. Check local zoning for home businesses and any customer pickups.
What are the most profitable microgreens?
Popular, fast-growing varieties such as sunflower, pea shoots and radish sell steadily; specialty microgreens can command higher prices from chefs.
How long do harvested microgreens last?
Most last several days to a week or more when cooled quickly, packed dry and refrigerated; shelf life varies by variety.
Can I sell microgreens to grocery stores?
Yes, with consistent supply, good packaging and labeling, and any insurance or food safety documentation the store requires.
What growing medium is best for microgreens?
Many growers use a fine soil mix or coconut coir; others use grow mats. Choose based on the varieties you grow, cost and how easily you can keep the medium clean and consistent.
Keep learning
- Microgreens industry data
- How to start a market garden business
- Market food vendors industry data
- Pricing calculator
Sources
- FDA, FSMA final rule on produce safety
- US Bureau of Labor Statistics, Farmers, ranchers and other agricultural managers
- USDA Food and Nutrition Service, SNAP at farmers markets
- Institute for Justice, State reforms for cottage food and food freedom laws
Last reviewed November 2, 2026. Startup costs are estimates; check local prices, licensing and tax rules before you commit money.

