Recently, Hubbard College of Administration based in Los Angeles, USA approached us for solving one of their challenges they were facing with the Office 365 mail and ODOO integration.

How to Guide for Office 365 mail and ODOO integration
It was a challenging task resolving the issue because everything seemed pretty ok with the ODOO version 10 community edition implementation and Office 365 mail settings that were done previously.
We had analysed and tested the setup with various IP addresses, domain names and test servers but none really seemed to work the way College’s CLOUD setup was implemented.
Their domain name was pointing to their CLOUD servers where the entire website and intranet portal were setup.
College was running in the CLOUD on a Windows server with their website hosted on the same CLOUD and because IIS server has its own configuration and compatibility limitations the Office 365 mail and Odoo integration further posed challenges.
Here we would like to share a very important piece of information with the users as you may face a similar issue while integrating office 365 mail and ODOO ERP.
Sometimes you may come across an issue where you notice that after completing the SMTP settings in ODOO as per the Office 365 mail integration instructions, ODOO sends emails to the internal Office 365 mail users (users that are within the same organization) successfully but it fails to send emails outside the organization or to the users with a different email address on a different domain.
Quite Strange, yes? Well, the simplest solution to this problem is that you delete all the entries for the mail flow connector and recreate them.
We found something pretty strange and would like to share it so that other developers, companies and administrators can resolve the same issue without any problems.
Creating the connector that relays emails may not work if created before mailbox recipients are added as it is related to some kind of weird cache issue in office 365 because after deleting the entries and we re-entered it with the same details and it worked. ODOO successfully started sending emails integrated with Office 365 to the users on different domains and outside the organization.
We are sharing step-by-step process for office 365 mail and ODOO integration:
Step 1) Login to the Super Admin account of your Office 365 portal where you have full access to do the configuration as shown in the Pic below:

Step 2) Click the Admin > Dashboard > Connectors in your Office 365 Admin Panel

Step 3) After you Click on the Connectors > click the ‘+’ Sign as shown on the image and enter the Connector Details

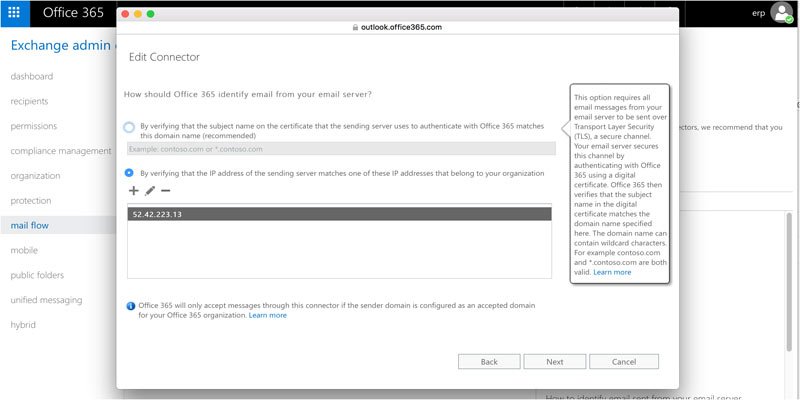
Step 4) Now enter the Connector details in the Edit Connector Panel as shown in the image below:

In our case since we had to integrate office 365 mails to ODOO ERP we had named the connector as ODOO.
Remember check both the options with check boxes as shown in the figure:
- Turn it on
- Retain internal exchange email header
Step 5) After Adding the connector you will have to add the ip address or the domain name of your email sending server. You can choose either of the two options to authenticate with the office 365 as shown in the image below:
Step 6) After you have completed the connector adding steps and ip address authentication step>save all settings as show in the image below:

Now since we have completed the Office 365 mail settings for the successful ODOO ERP integration, let’s configure the ODOO mail settings:
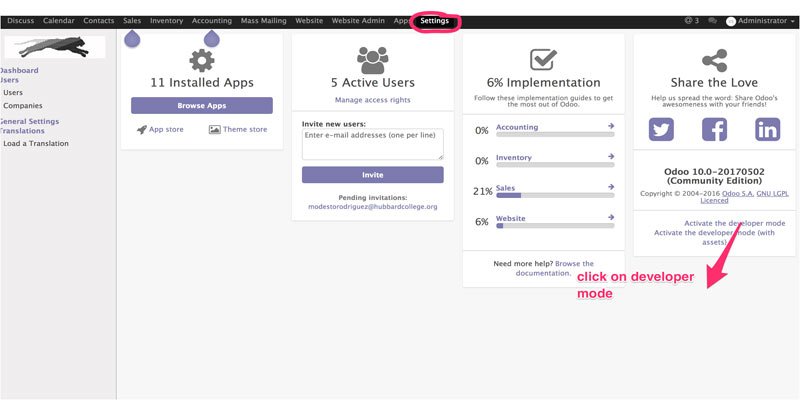
Step 1) Login to your ODOO Admin panel as an administrator >click on the settings> and switch to the developer mode as show in the image below:
Step 2) Click the outgoing mail servers link and click ‘create’ to paste MX record that you can find in your office 365 mail Admin panel as shown in the image below:
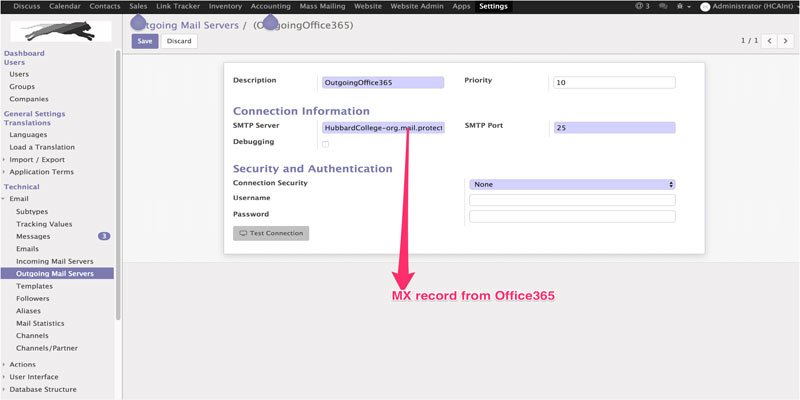
Step 3) After you have completed the above step of copy pasting your office 365 MX record in your ODOO outgoing mail server then it should look like as in the image below and you are ready to test and send emails through ODOO integrated to your Office 365 mails.

In order to successfully integrate ODOO with office 365 for sending emails follow the above steps and read our guide carefully. We have shared each and every insight and problems that we came across while integrating ODOO with office 365 mails.
You can get in touch with us 24×7 if you need any help or looking for a complex ODOO implementation or Office 365 setup for your organization.
Call US +1(205)624 7254 | Europe +44(203)695 0021 or leave a message and one of our associate will get in touch with you shortly.


Leave a Reply